The 5 Best Ways to Prevent Ice Dams in Homes
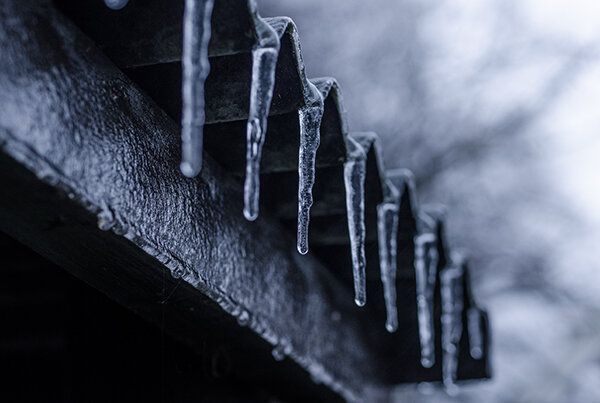
Anyone who has lived in a cold climate will be familiar with ice dams. Ice dams occur when melted snow runs down your roof and re-freezes at your roof overhangs and gutters. The more ice that melts and re-freezes the larger the ice dam becomes. Eventually the ice dam will become so large that it backs up underneath your roof shingles and leaks into your house.
Many homeowners think that gutters are the main reason why ice dams are created, especially if they are not cleaned out. You will also see many people using a roof rake to remove the bottom few feet of snow on their roofs as a way to prevent ice dams. Yes, cleaned gutters and snow removal at the point of re-freezing will help to prevent ice dams, but those are not the primary cause of them.
The true cause of ice dams comes from the underside of the snow on your roof melting and traveling down to the point where it will re-freeze, but what causes the underside of the snow to melt in the first place? This happens when your attic level is too warm and the underside of your plywood sheathing is warmer than the outside temperatures.
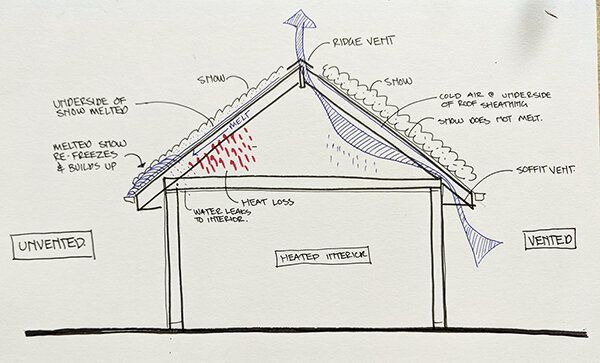
The two reasons I usually see for warm attics are inadequate roof venting and penetrations through the ceiling into the attic level. By providing the correct soffit-to-ridge venting and by not creating any lighting or HVAC penetrations in your ceiling, and by having proper insulation at your ceiling level, with baffles to allow for air-flow you can prevent ice dams in your house.
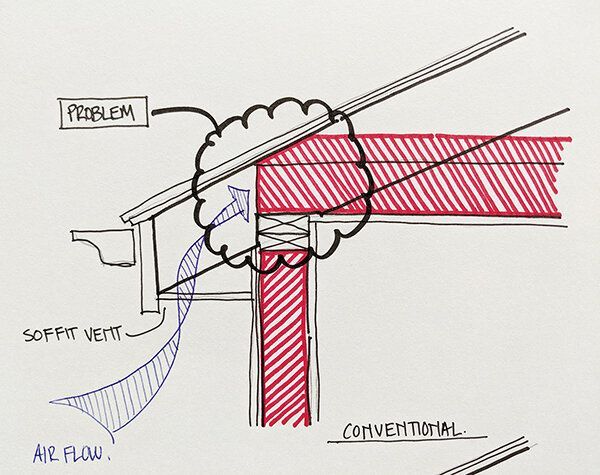
Essentially, you want your attic to be a cold as the outdoor temperatures. If you go up into your attic during the winter months and it is warmer than outside (minus wind chill) than you have a problem and should address your systems as I note below.
Now onto the 5 best ways to prevent ice dams – if you are building a home, or if your current home suffers from ice dam problems take the following strategies.
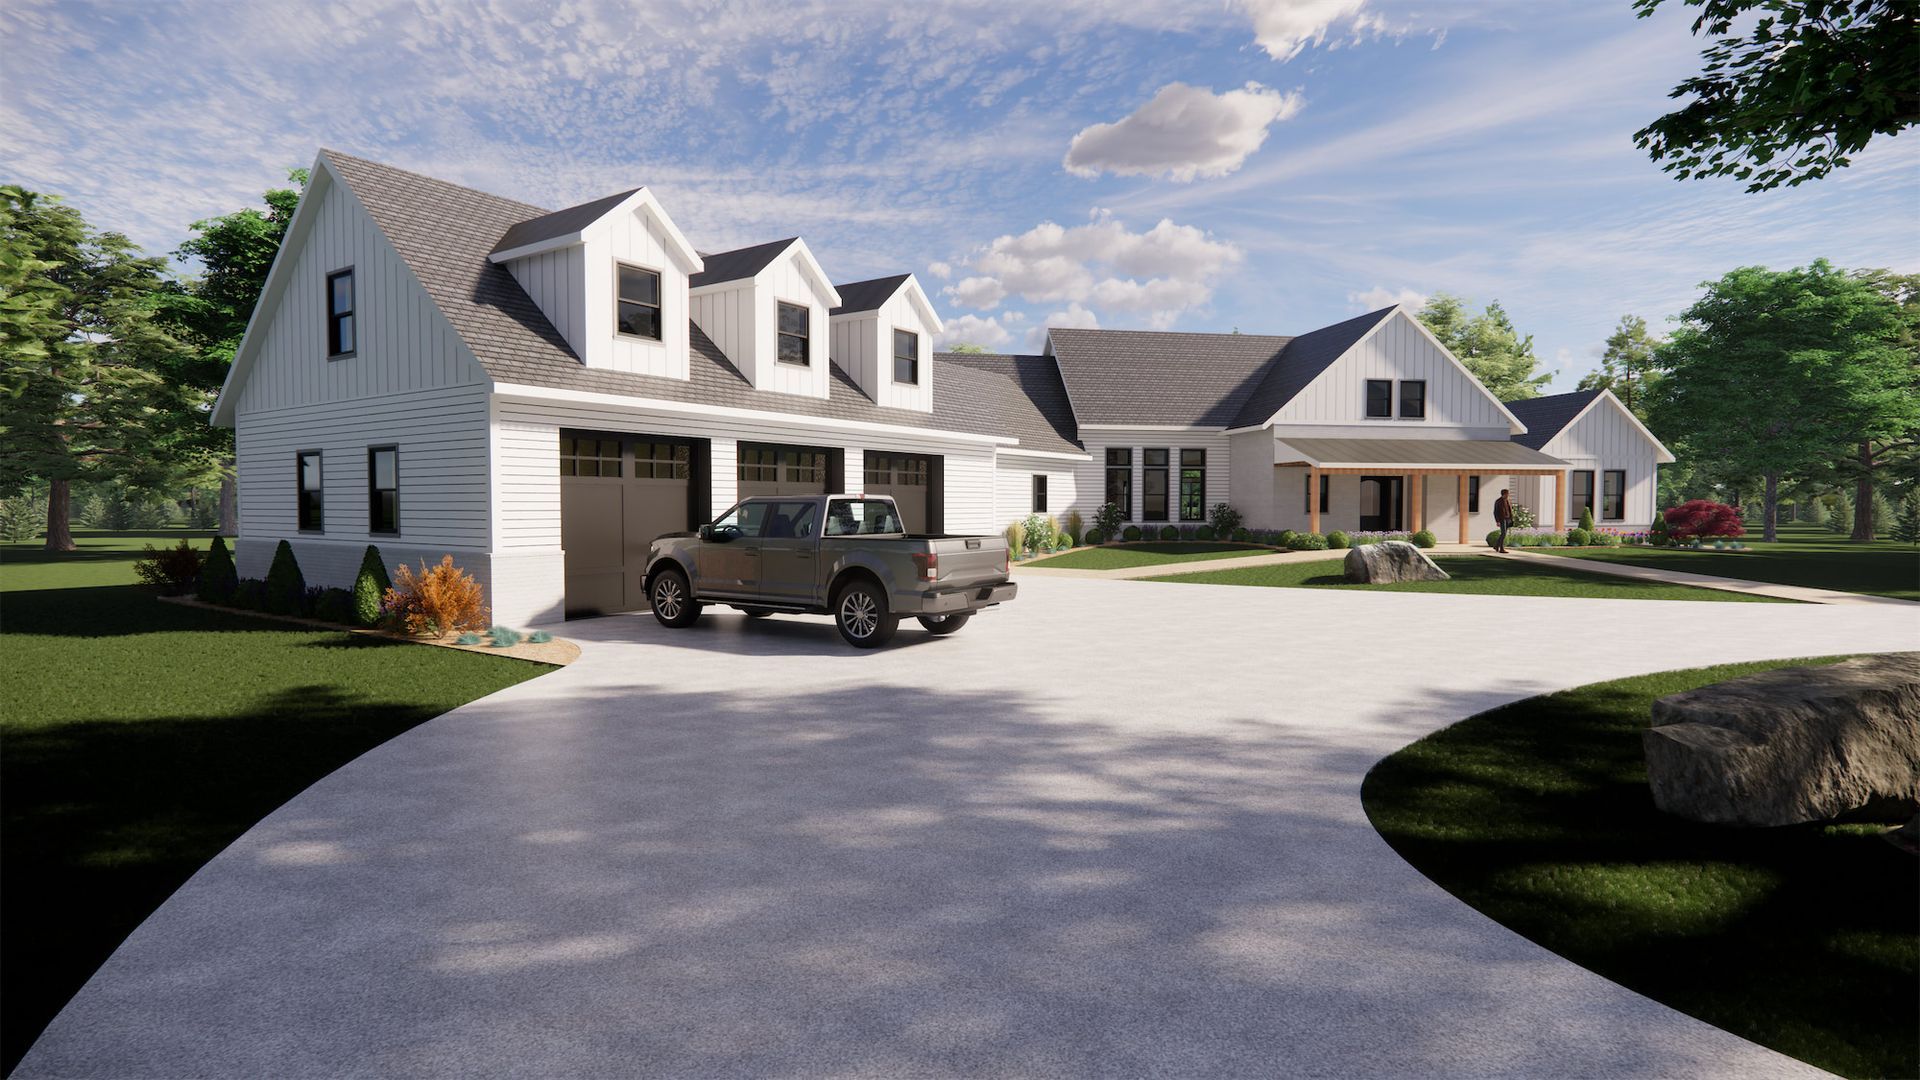
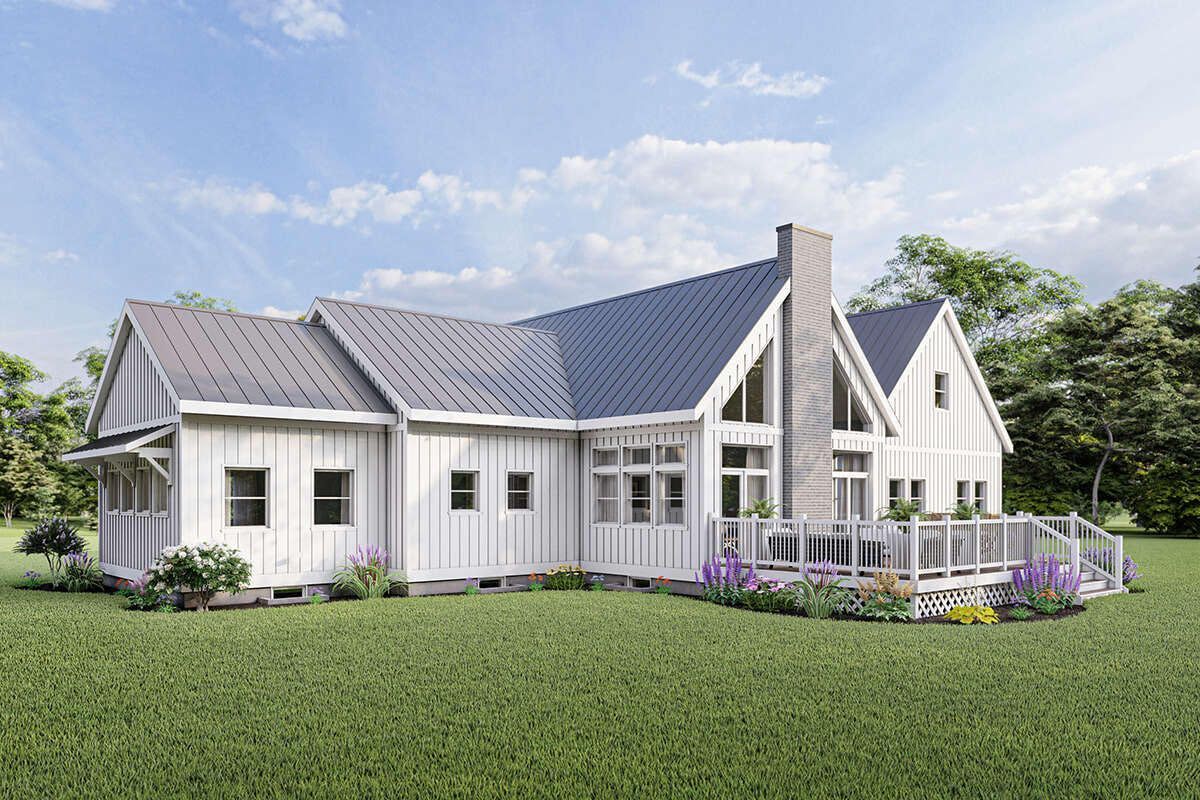
1.) Soffit to Ridge Venting:
Soffit to Ridge Venting is by far the most effective venting systems for the majority of roof types. This venting system allows cold air to enter into your attic through the roof overhang and travel up the underside of the plywood roof sheathing and vent out the ridge (or top) of your roof structure.
Always install a fully vented soffit system. Make sure your contractor does not install the soffit material which has every third panel as a vent, you want the fully vented system so that cold air can enter into your attic along the entire length of your roof overhang.
If you have an older house, be careful that there is not plywood installed on the underside of your roof overhang. If so, no matter what type of vented soffit material is installed you will not achieve a proper air flow. If you are installing a new vented soffit you must observe these conditions before your contractor installs the new material. If you see plywood run on the underside of the overhang, have your contractor remove it. If the contractor suggests that you can achieve the required venting by drilling some holes into the plywood, do not accept this. Holes in the plywood every few feet does not give you the quantity or continuous nature of the fully vented system.
Another error I see in single family homes is the installation of gable end vents. If your house has gable end vents then most likely you do not have a vented soffit. Gable end vents do let some cold air into the attic, but it is not nearly as effective as the soffit to ridge venting system. Even more of a problem is if your house has a soffit to ridge venting system AND gable end vents. In this case, more cold air is not helping, the two systems will cancel each other out and you will not achieve the cold roof structure that is needed to prevent ice dams.
2.) No Penetrations Between Your Ceiling and Attic:
This tip is very important and I know there will be a lot of homeowners that do not like hearing this, but it is true – you cannot have recessed lighting in your upper most floor level of your house. If you have a ranch house, this means no recessed lighting at all (unless you have a dropped soffit) if you have a Cape or Colonial style house this means no recessed lighting on the second floor level, or whatever floor level is between the top most living space and your cold attic.
The same goes for HVAC penetrations. I cannot count the amount of times I see ductwork run in the attic level in cold (even warm) climates. You are doing yourself a dis-service if you install ductwork in an unconditioned attic. Not only will the attic temperatures affect the supply air in the summer and the winter, but the penetrations through the ceiling is a way for hot air to escape into the attic in the winter, and cold air in the summer.
I don’t care how good of a job a contractor does installing the light fixture, or HVAC grill, even if the penetration is sealed with spray foam insulation from the attic level, you will still have the air leakage into the attic.
By not having any penetrations between your ceiling and your attic the air-sealing qualities are greatly enhanced and the chance of hot air getting into your attic during the winter, warming the underside of the plywood roof sheathing and melting the underside of the snow is drastically reduced.
If you are building a new house, make sure your contractor knows not to create any penetrations between the ceiling and the attic. Do not allow them to install ductwork within the attic level, find another way or consult an architect. Bonus tip – have the contractor install a bead of caulking around the top of the gypsum wall board around the entire perimeter of each room in your upper most floor level.
If you have an existing house and you have recessed light fixtures between your ceiling and attic. My professional opinion is to remove them asap. You will have a more efficient home during both heating and cooling seasons (i.e. less money you have to spend to heat and cool your house) and you will eliminate a major point of heat loss through the ceiling. There are many different lighting options you can consider, instead of the recessed can fixtures.
If you have an existing house with ductwork in the attic it may be more costly, or not possible to relocate the ductwork. In this case I would recommend getting up into your attic and building a box around the top of all ductwork. By enclosing the ductwork, including installing caulking at the joints, and adding insulation over the sides and top of the box structure you are essentially relocating the ductwork to within the conditioned space (figuratively) and if you seal up the enclosure properly you will eliminate heat loss into the attic. Bonus – you will most likely spend less money on heating and cooling as the air inside your ductwork will not be as effected by the temperature of the attic.
3.) Simplified Roof Structures – or Added Venting:
There is no question that the simple gable or shed roof structure is the easiest to build. They are also the most efficient in terms of cost of material. Another benefit is the gable or the shed roof structure provides the most effective soffit to ridge venting system. If you are building a house in a cold weather climate, consider the simple gable if ice dams are a concern to you.
But a simple, continuous gable or shed roof is not always possible. Some people like the appearance of a hip roof, or have a more complex house form that requires a change in the direction of the roof, or simply like the look of dormers. If these conditions apply to you than you may not be able to achieve enough continuous soffit venting to keep the underside of your plywood cold in the winter, especially at hips and valleys in your roof. So what do you do?
The best way to overcome this is to install static roof vents in the locations of the hips and valleys. Static roof vents are small square venting materials that allow for additional airflow. Unlike gable end vents, the static roof vents will not cancel out the effectiveness of the soffit to ridge venting in the rest of your house.
4.) Spray Foam Insulation in Attic:
This tip is highly recommended for anyone building a new house, and even those looking to boost the energy efficiency of your existing house.
Spray foam insulation works so well not only because of the higher R-Value per inch of thickness, but also that it gets down into all the cracks and joints between your framing and your sheetrock walls and ceilings. By sealing up all these tiny cracks and joints the spray foam insulation stops conditioned air from escaping into your attic. Just like a few of the tips mentioned here, this will help you save money in both the summer and the winter.
Spray foam can be expensive though! The good news is that you do not need to install full thickness of spray foam to get the air-sealing benefits. In many of my projects we specify a ‘flash-coat’ of spray foam over the entire attic area. This flash coat is usually only 1” thick, but it covers the top side of your sheetrock ceiling, and around all attic framing members. The flash coat gets into all the cracks and joints as noted above to prevent air leakage. Then you can use Cellulose, or Fiberglass Batt insulation ontop of the flash-coat to obtain your full insulation R-Value.
If you have an existing house and want to consider a flash coat of spray foam, you would first need to remove all your existing insulation so that the flash coat can be properly applied.
5.) Insulation Baffles:
No matter what type of insulation is in your attic you will be required to have some sort of insulation baffles where your roof comes down to meet the top of your exterior wall. Insulation baffles allow the insulation to completely cover the top of your ceiling and allow the cold air to run above the baffle and continue up to your ridge vent.
Without baffles your insulation could potentially block the airflow from your soffit vent at the roof overhang, preventing the cold air from running along the underside of the plywood roof sheathing and causing the snow on your roof to melt.
It is even more critical to have insulation baffles (solid type or baffles secured to framing) if you have blown-in cellulose insulation in your attic. What will happen if you have cellulose insulation with no baffles is that any gusts of wind that come through your soffit vent, will actually blow the insulation out of place, resulting in a cold spot in your ceiling. This will not only reduce the comfort of that room, but you will be spending more money on heating and cooling to keep that room at a comfortable temperature. I have even seen, in extreme cases where cellulose insulation has been blown out of place by not having a secured baffle over bathrooms and the amount of cold air transfer has frozen pipes.
There are different types of baffles available, each with their pros and cons, the type of baffle you use is also determined by the type of insulation that you have in your attic. It is important that you have a discussion with your architect or contractor on which type of insulation baffle to be used, before the work gets underway. Lets look at the different types from least effective to most effective.

- The foam or plastic baffles that are simply slid into place with nothing securing them other than the weight of your insulation pushed against the underside of the roof. These are the worst possible baffles to install in your home, and coincidentally they are the kind that I see most often in houses – why? Because they are the least expensive! The only time it is acceptable to even consider these types of baffles is when you have fiberglass batt insulation. Any other insulation type (cellulose, spray foam) will not work with these baffles. Especially with cellulose insulation. For the same reasons I noted above, strong gusts of wind can actually blow these unsecured baffles out of place, and then blow your cellulose insulation out of place.
- Cardboard Baffles – the benefit that the cardboard baffles have over the type that just slide into place is that there are tabs that are bent down along the edges which allow you to secure the baffles to the sides of your roof framing and thus keeps the baffles locked into place. The downside is that the cardboard material will eventually deteriorate and need to be replaced, or even worse grow mold and cause health concerns for you and your family. There are similar types of baffles available in plastic material which do not have those problems. If you are renovating your home, this is the type I would recommend to use.
- Plastic Type Baffles that get mounted over the top of your roof framing – The benefit of these baffles vs the plastic type outlined above is that when the baffle wraps up and over the top of your roof framing, it is providing a much more secure connection. This type can only be installed in new construction, unless you are removing your plywood roof sheathing when having an existing roof replaced. If you wish to use this type of baffle you will need to coordinate with your contractor before they install your roof as the baffles will need to be put in place just after roof framing is completed, but before the plywood roof sheathing is installed.
- Solid Baffles are the most effective, using 1/2" plywood mounted to blocking on the side of your roof framing this type of baffle is guaranteed not to move and you can safely install spray foam or cellulose insulation against it. The challenge with solid baffles is that you need to have enough of a roof overhang, and enough of a pitch so that you can get the correct amount of insulation over the top of your exterior wall. If you are utilizing a prefabricated roof truss and you want to use a solid baffles I recommend using a raised heel roof truss. With a raised heel truss the top chord (pitched) sits ontop of the bottom chord at the end of the overhang. This configuration will gain extra room over the top of the exterior wall allowing for the use of the solid baffle.
6.) Bonus Tip – Mechanical Venting:
If you desire additional protection against ice dams or if you have an existing house and you feel that the tips above would require too much work you may want to consider mechanical ventilation. Mechanical Ventilation would consist of a fan up through your roof structure that sucks the warm air out of your attic during the winter months (opposite during summer) This would require hiring a roofer and an electrician to install. You could set up the fan on a manual switch, (but you would need to remember to turn it on often) or on a timer.
7.) Bonus Tip 2 – Ice and Water Shield:
Ice and water shield is a 3 feet wide roll of a rubber type product that is installed before your roof shingles. This protects against any ice or water which may happen to back up underneath your shingles from leaking down into your house.
The problem I often see with ice and water shield in residential construction is that too little of it is installed. If you have a 12” overhang, and the ice and water shield comes in a 3 foot roll than you are only getting 24” of protection. I always recommend a double row of ice and water shield at the bottom of your roof – 6 feet up from the edge. I also would recommend that the ice and water shield is installed on all hips and valleys and at any change in roof pitch or when any dormer roof connects to the main roof.
I hope you find these tips helpful, my goal is to provide education and value to all homeowners.
Thanks, Chris